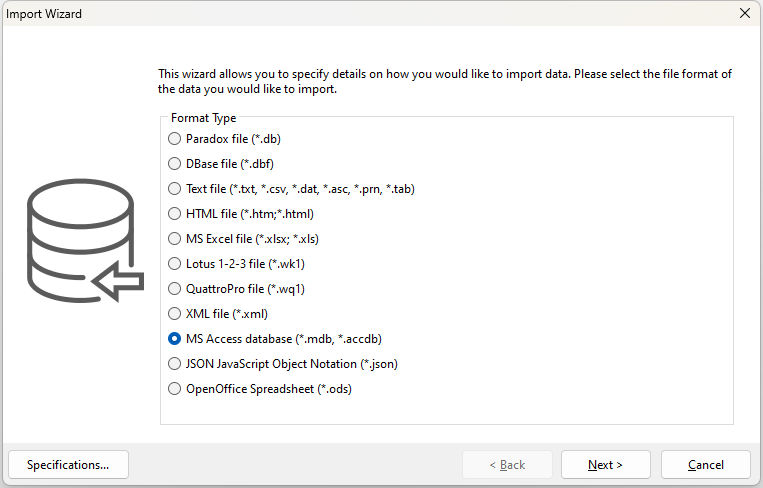
After pressing the Start button, the Import Wizard (figure 1) will begin and guide you through the process.
(figure 1)
On this screen, select the MS Access Database (*.mdb, *.accdb) option and press Next to continue.
NOTE:
The Microsoft Access Database Engine 2010 Redistributable must be installed on the computer to import .accdb files.
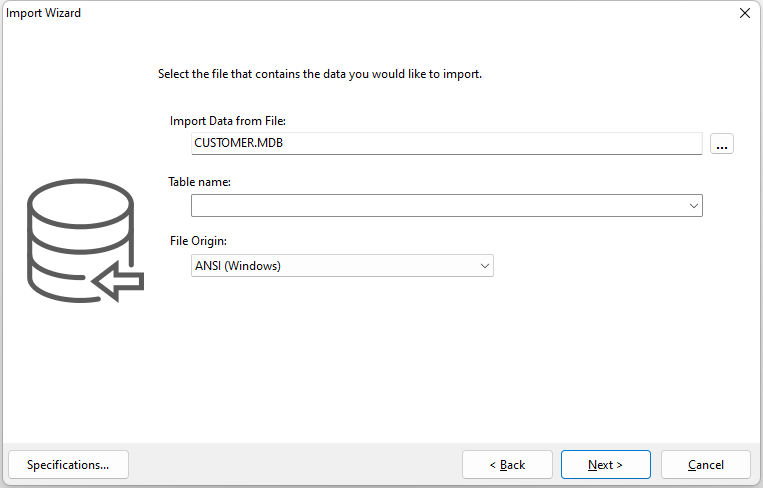
You will now be prompted to specify the source file for the import in the Import from File field (figure 2). You can press the ... button to navigate to the source file.
The table name can be entered within the next field.
Also, you will need to specify the origin of the file data character set, ANSI (Windows), or ASCII (DOS).
(figure 2)
After making your selections, press Next to continue.
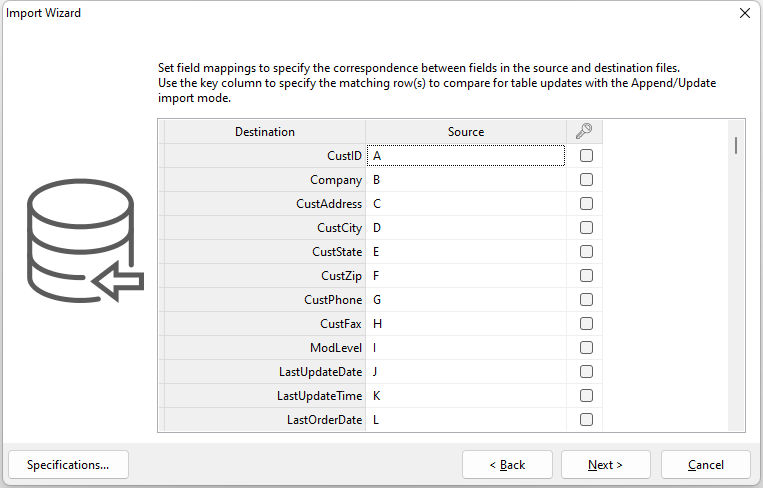
Field mappings allow you to select which fields correspond with existing fields in the table (figure 3). Simply check or uncheck the check-box in the  column for the related row, and click the Source field for the particular Destination field to configure the mapping from the source file.
(figure 3)
After making your selections, press Next to continue.
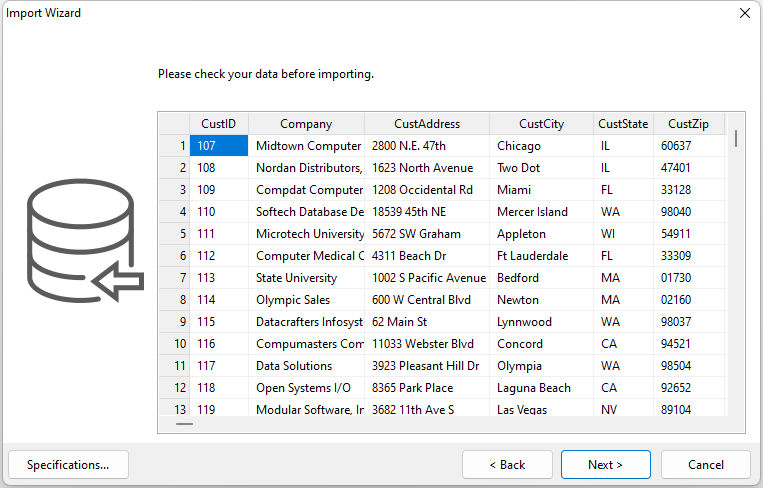
The following screen allows you to preview the data layout to make sure that the data is correctly laid out (figure 4). You can make the necessary changes to your import settings by using the Back button to revisit the prior screens.
(figure 4)
After verifying, press Next to continue.
During the import process, the "Specifications..." button is available to save your import options or to load preexisting options from a previous data import. The specification file will store your import options for type, source file, fields, settings and mode.
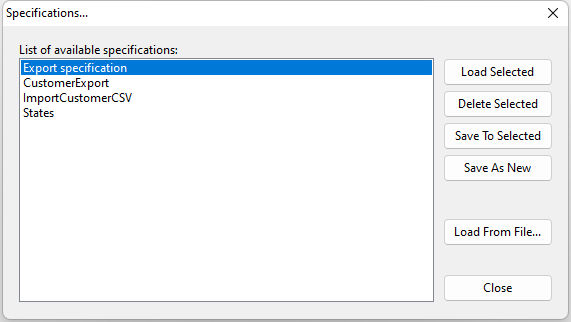
•Load Selected - loads the selected specification file options into the current import process
•Delete Selected - deletes the selected specification file
•Save To Selected - saves the current import options to the selected specification file
•Save As New - saves the current import options to a new selected specification file
•Load From File - loads a specification file that is not located in the current folder. Note that this function does not add that file to the list of items. The contents of the file is loaded and applied to the wizard and the Specifications is closed. It is expected that the contents will be modified (at least the import source). After the expected modifications, the specification file can be saved to the current folder and given a proper name (using the "Save As New" button).
The specification files can be loaded for the current data import, saved for future imports (using both the user interface or the GATEWAY command), or deleted. The specification files are stored in the current database directory with the .RGW file extension. Once a specification file is loaded, the file and path is displayed.

The last step is choosing your import mode (figure 5). The options are: Append; Update; Append/Update; Delete; and Overwrite.

(figure 5)
Make your selection, and then press Execute to import the data accordingly.