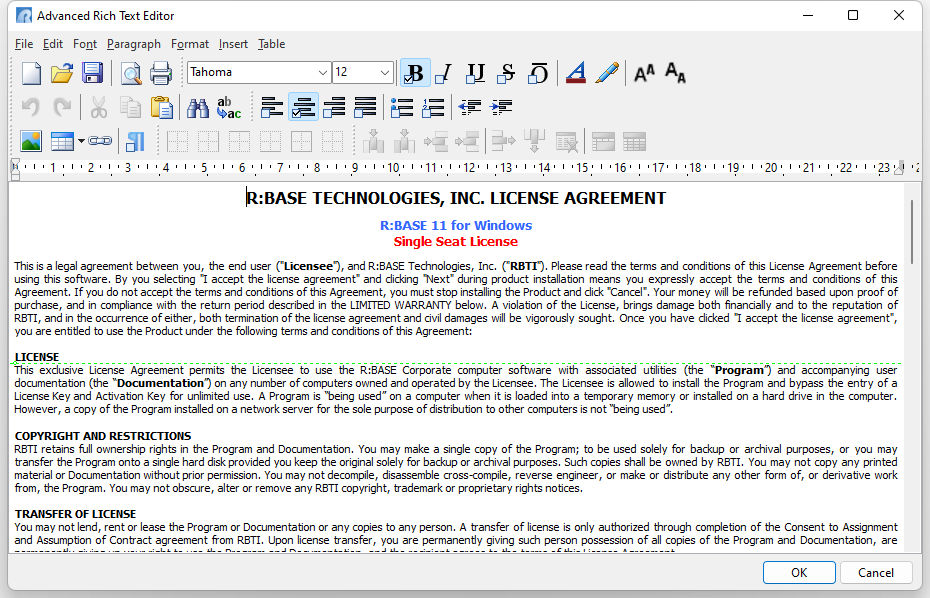
The Advanced Rich Text Editor is the new graphic user interface for working with Rich Text data in R:BASE. The Advanced Rich Text Editor allows for the rich formatting of text, images, tables,hyperlinks, lists, with ease-of-use manipulation with drag-and-drop and sizing support for content. The editor's toolbar is extensive allowing users to achieve a high degree of customization.
The editor can be accessed from within R:BASE forms using the Advanced DB Rich Text Control. In reports, there are three specific "Advanced Rich Text" controls that allow the placement of rich text with the advanced formatting the control supplies. The Advanced Rich Text Editor is also built into the R:BASE BLOB Editor when creating or editing rich text data.
When added to R:BASE reports, the built-in "Mail Merge" option can be used to insert R:BASE columns and variables with text to create table driven output.
The Advanced Rich Text Editor can also be used to import existing files into R:BASE or even create rich text files for external file use.

Other features include:
Text Formatting
•Paragraphs , Borders, Backgrounds, Indents, Spacing, etc.
•Select the font face and font size and font color for selected text
•Standard formatting (Bold, Italic, Underline, Strike out, Overline)
•Left, Center, Right and Full Alignment of selected text
•Remove formatting from selected text
•Indent and outdent selected text
Table Formatting
•Insert tables
•Insert table row before current row
•Insert table row after current row
•Insert table column before current column
•Insert table column after current column
•Delete current column
•Delete current row
•Edit table properties
Hyperlinks
•Create hyperlinks
•Remove hyperlinks
•Edit Hyperlinks
Images
•Insert images
•Change layout properties such as alignment and spacing
Lists
•Insert numbered lists
•Insert bulleted lists
Other Functionality
•Insert R:BASE columns
•Insert R:BASE variables
•Insert horizontal lines
•Insert symbols from character map
•Undo/Redo
•Cut, copy and paste
•Select all
•Print Preview
•Page Setup
•Find and Replace
•Toggle the display of not-printing characters