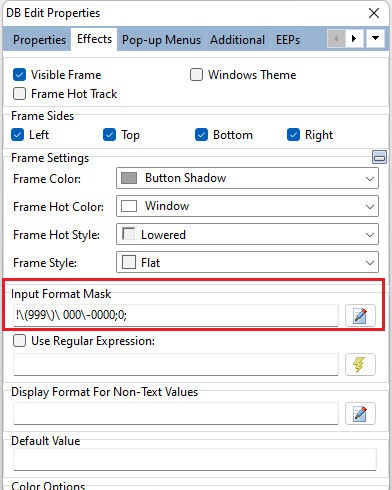
Format Mask is a built-in input verification feature that specifies what text is valid for DB Edit and Variable Edit controls in forms. R:BASE also supports Format Masks for the DIALOG command. For either usage, a format mask is beneficial when prompting for input data where certain values are formatted and the input is restricted to prevent user error.
Examples of formatted data include social security numbers, phone number, extended zip code, and credit card numbers.
Use Format Mask to restrict the characters a user can enter into the masked DB Edit, Variable Edit or DIALOG for valid characters and formats. If the user attempts to enter an invalid character, the DB Edit Control, Variable Edit Control or DIALOG does not accept the character. Validation is performed on a character-by-character basis. Setting Format Mask to an empty string removes the Format Mask.
Using Format Mask option, you can have user enter values in one way using the Format Mask, but the actual values can be saved different way. For example a phone number can be entered as (123) 456_7890 but stored as 1234567890.
Using Format Masks
Format Mask is a string that consists of three fields with semicolons separating them. The first part of the mask is the mask itself. The second part is the character that determines whether the literal characters of a mask are saved as part of the data. The third part of the mask is the character used to represent unentered characters in the mask.
First Field Characters
Specifier Displays
!
If a ! character appears in the mask, optional characters are represented in the text as leading blanks. If a ! character is not present, optional characters are represented in the text as trailing blanks.
>
If a > character appears in the mask, all characters that follow are in uppercase until the end of the mask or until a < character is encountered.
<
If a < character appears in the mask, all characters that follow are in lowercase until the end of the mask or until a > character is encountered.
<>
If these two characters appear together in a mask, no case checking is done and the data is formatted with the case the user uses to enter the data.
\
The character that follows a \ character is a literal character. Use this character to use any of the mask special characters as a literal in the data.
L
The L character requires an alphabetic character only in this position. For the US, this is A_Z, a_z.
l
The l character permits an alphabetic characters in this position, but doesn't require it.
A
The A character requires an alphanumeric character only in this position. For the US, this is A_Z, a_z, 0_9.
a
The a character permits an alphanumeric character in this position, but doesn't require it.
C
The C character requires an arbitrary character in this position.
c
The c character permits an arbitrary character in this position, but doesn't require it.
0
The 0 character requires a numeric character only in this position.
9
The 9 character permits a numeric character in this position, but doesn't require it.
#
The # character permits a numeric character or a plus or minus sign in this position, but doesn't require it.
:
The : character is used to separate hours, minutes, and seconds in times. If the character that separates hours, minutes, and seconds is different in the regional settings of the Control Panel utility on your computer system, that character is used instead.
/
The / character is used to separate months, days, and years in dates. If the character that separates months, days, and years is different in the regional settings of the Control Panel utility on your computer system, that character is used instead.
;
The ; character is used to separate the three fields of the mask.
_
The _ character automatically inserts spaces into the text. When the user enters characters in the field, the cursor skips the _ character.
Any character that does not appear in the preceding table can appear in the first part of the mask as a literal character. Literal characters must be matched exactly in the edit control. They are inserted automatically, and the cursor skips over them during editing. The special mask characters can also appear as literal characters if preceded by a backslash character (\).
Second Field Characters
The second field of the format mask is a single character that indicates whether literal characters from the mask should be included as part of the text for the edit control. For example, the mask for a telephone number with area code could be the following string:
(000)_000_0000;0;*
The 0 in the second field indicates that the Text property for the edit control would consist of the 10 digits that were entered, rather than the 14 characters that make up the telephone number as it appears in the edit control.
A 0 in the second field indicates that literals should not be included. Any other character indicates that they should be included. The character that indicates whether literals should be included can be changed in the Format Mask property.
Third Field Characters
The third field of the format mask is the character that appears in the edit control for blanks (characters that have not been entered). By default, this is the same as the character that stands for literal spaces. The two characters appear the same in an edit window. However, when a user edits the text in a masked edit control, the cursor selects each blank character in turn, and skips over the space character.
Note:
When working with multi-byte character sets, such as Japanese Shift_JIS, each special mask character represents a single byte. To specify multi-byte characters using the L, l, A, a, C, or c specifiers, the mask characters must be duplicated as well. For example, LL would represent two single-byte alphabetic characters or a one double-byte character. Only single-byte literal characters are supported.
Examples of Format Mask in the Form Designer:
| Save Phone Number as Displayed: | (000) 000_0000;1;_ |
| Save Numbers Only: | (000) 000_0000;0;_ |
Examples of Format Mask using the DIALOG Command:
Example 01:
SET VAR vSSN TEXT = NULL
CLS
DIALOG 'Enter Social Security Number||000_00_0000;0;_' +
vSSN=26 vEndKey 1 CAPTION 'Example 01' ICON APPS
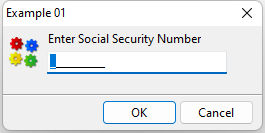
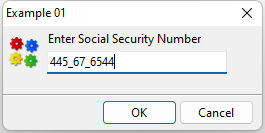
Will return the TEXT value of vSSN as 432222986
Example 02:
SET VAR vPhone TEXT = NULL
CLS
DIALOG 'Enter Phone Number||(000) 000_0000;0;_' +
vPhone=26 vEndKey 1 CAPTION 'Example 02' ICON HELP
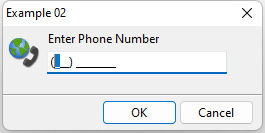
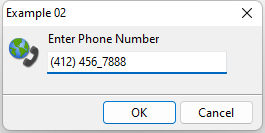
Will return the TEXT value of vPhone as 7247240053