You will notice spaces or null values "-0-" between the customer name and the address on the labels as not all customers have company names and not all customers have two address lines. We want R:BASE to compress the lines of the label if there is no data in a column. We will create a new label to utilize the line compression.
To print a label to compress the lines:
1. In the Database Explorer, choose the "New Label..." option.
2. In the "Label Name:" field, enter "CustomerLabelCompress".
3. Choose "Customer" from the list of tables/views.
4. Enter "Customer Label - Compressed"
5. Click the OK button.
The "Label Templates" dialog is displayed. We will select the same template as the previous label.
6. From the list of "Products", choose the Avery "5160 - Address" label.
7. Click the OK button.
The Label Designer window is displayed.
The first step is to define a variable that contains all of the available columns used for the address.
| 8. | In the "Label Designer" window, choose Variables: Add/Edit Variables... |
The "Expression Builder" dialog box opens, ready for you to enter an expression for the variable.
| 9. | Enter "vAddress" under "Name:". |
| 10. | Select "TEXT" in the "Type" drop down box. |
| 11. | Place the cursor in the "Expression" panel and press the [F3] key to launch the Data Dictionary. For this label, the column names will be captured to insert into the variable expression. |
| 12. | Select the "Columns" tab, and then select the "Customer" table. |
The Data Dictionary will display the columns defined for the Customer table.
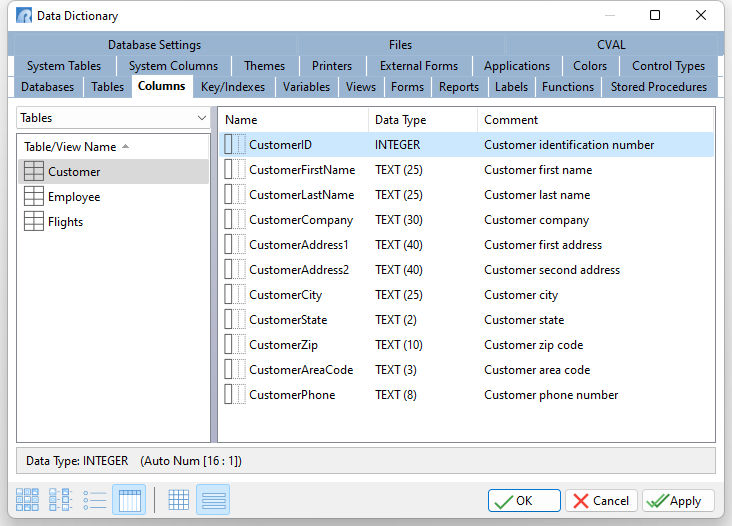
| 13. | Within the column list, select "CustomerFirstName, CustomerLastName, CustomerCompany, CustomerAddress1, CustomerAddress2, CustomerCity, CustomerState, and CustomerZip", in this order. To select all of the columns, hold down the [Ctrl] key while selecting each column. |
| 14. | After the columns are selected, press the "OK' button. |
All of the column names will be inserted into the "Expression" panel. Now, the expression string must be built.
| 15. | Place an open parenthesis at the beginning of the column list, and a close parenthesis at the end. |
| 16. | Between the CustomerFirstName and CustomerLastName columns remove the comma and insert the ampersand character (&). |
| 17. | Between the CustomerState and CustomerZip columns remove the comma and insert the ampersand character. |
| 18. | Between the rest of the columns, remove the commas and place the plus character (+). |
| 19. | Next, between each each individual label address lines, insert the (CHAR(013)) function with a plus character. For example, the name will be on a separate address line than the company name, so insert the function there. |
The CHAR portion of the variable expression is another R:BASE function. It is categorized as a "conversion" function that converts an ASCII integer value to its corresponding character. The (CHAR(013)) function represents a carriage return, so when the address is printed, this portion will be sent to the line below.
(CHAR(integer))
| 20. | After the city column and plus character, add a comma and space enclosed in single quote characters followed by a plus character. This will inserts a comma and a space to correctly display the city state and zip line accurately. |
The image below is an example of what the variable expression should look like. Note that the name is separated from the company with the (CHAR(013)) function, along with the two addresses, and the city state and zip code columns, just like the standard address format. Also note that between each (CHAR(013)) function and a column there is a plus character. The plus characters are used to combine the text string.
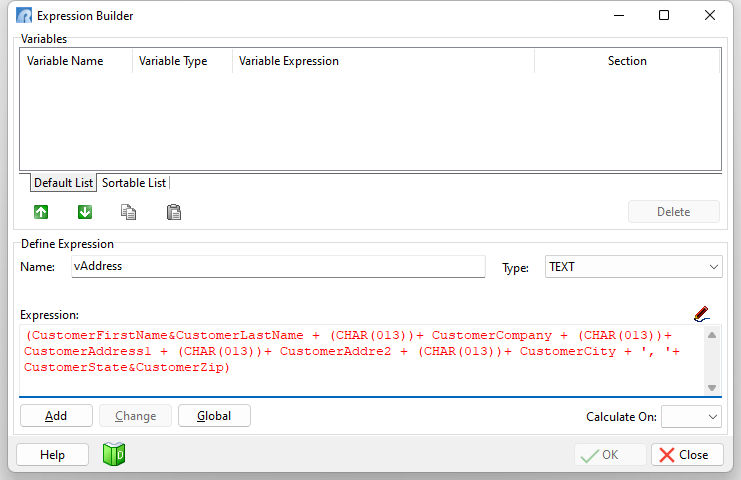
| 21. | Select the "Add" button to save the variable. If you receive any errors, fix the typo(s), or simply copy and paste the following into the "Expression" panel: |
(CustomerFirstName&CustomerLastName+(CHAR(013))+CustomerCompany+(CHAR(013))+CustomerAddress1+(CHAR(013))+CustomerAddress2+(CHAR(013))+CustomerCity+', '+CustomerState&CustomerZip)
| 22. | Press the "Apply" button to save the variable, and then the "Close" button to close the Expression Builder window. |
| 23. | Next, add a Variable Memo control to the top left corner of the label. On the Variable Controls Toolbar, it is the third button from the left. |

| 24. | Stretch the control so it fills the entire available label space. |
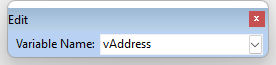
| 25. | With the control selected, assign the variable vAddress from the "Edit Toolbar. |
| 26. | From the "Format" Toolbar, change the font to "Tahoma", the size to "9", and the bold style by selecting the "B" button. |
| 27. | Now, preview the labels by selecting the "Preview" tab. |
The labels will display, only empty lines will appear where the data does not exist in the table. For example, the fourth label down for "Steven Fishman" does not have a company or a second address, so there are two empty lines in the address label.
| 28. | Select the "Design" tab to return to the label Designer. |
| 29. | Then, right click on the Variable Memo control and select "Suppress Empty Lines" from the context menu. |
This will remove the empty lines and create a fully dynamic address that will adjust for any missing lines.
| 27. | Again, preview the labels by selecting the "Preview" tab. |
The empty lines should be removed from the labels.
| 28. | Select the "Design" tab. |
Now, save the report.
| 29. | In the "Label Designer" window, choose File: Save. |
| 30. | Close the Label Designer to return to the Database Explorer. |