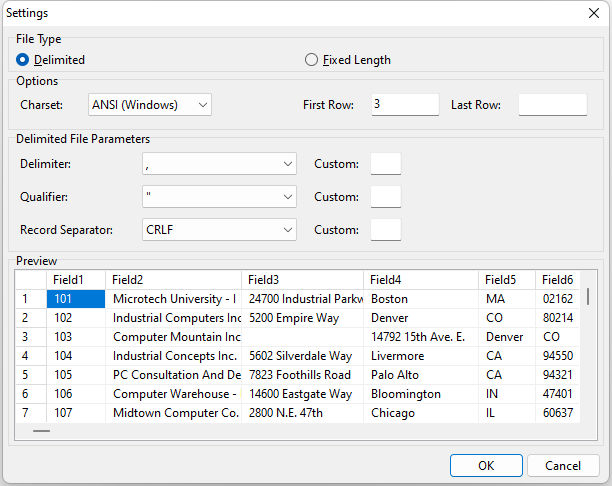
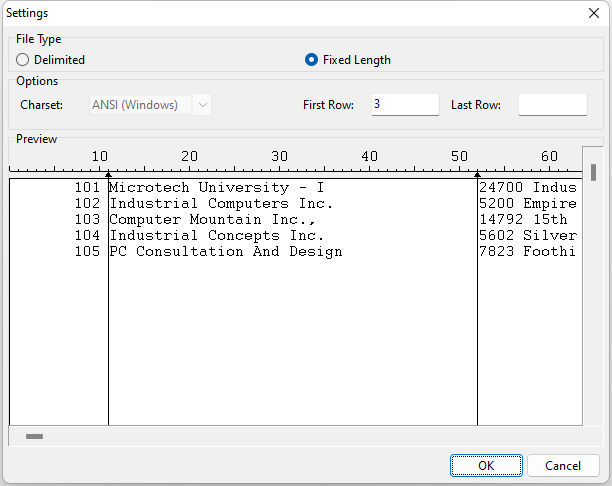
When importing ASCII into a new table, you will be presented with a dialog to configure the available settings.
ð File Type
Delimited
Indicates that the columns of data are separated by the character specified in the Delimiter section. Any column of data that has the Delimiter character imbedded in it will be surrounded by the Qualifier character.

ð Delimiter
Specifies which character is used as a delimiter in the source file
NOTE: If your data delimiter is not listed in the drop-down list, you can specify it by typing the character in the Custom field
ð Qualifier
Specifies which character is used to envelop non-contiguous alpha-numeric text strings which belong to a single field
NOTE: If your qualifier is not listed in the drop-down list, you can specify it by typing the character in the Custom field
ð Record Separator
Specifies which character is used as a record separator
NOTE: If your record separator is not listed in the drop-down list, you can specify it by typing the character in the Custom field
ð Charset
Specifies whether the data is based on the DOS ASCII or Windows ANSI character set
ð First Row
Specifies the position of the first row of data
NOTE: When using source files that have column headers or other information as a preface to the data, you will need to adjust this position to correspond with the row position of the first row of data to import
ð Last Row
Specifies the position of the last row of data. Default is blank to indicate all possible rows available.
NOTE: When using source files that have information as a suffix to the data, you will need to adjust this position to correspond with the row position of the last row of data to import. You can also use this value to import only a portion of an available data set within a source file by specifying the number of the last row of data that you want.
Fixed Length
Indicates that the columns of data are a fixed length. In a fixed length environment, you specify the length of the columns by dragging the arrowed lines to the correct position. To create a column, single-click anywhere there is no arrowed line. To delete a column, double-click the arrowed line you wish to remove.

After configuring the available Settings options, you will be presented with the dialog to alter the field name, data type, and size by selecting the field from the list of Available Fields, typing in the new Field Name in the space provided, selecting the data type from the Field Type drop-down list, typing in the desired size in the Field Size box, and pressing the Apply Field Changes button.
To alter the Settings for the import, press the Change File Settings button to revisit the Settings area.
You can also choose which fields are imported by checking or un-checking the box next to the field name.
NOTE: The First Row setting will be taken from the First Row setting in the Settings dialog. However, you can alter the final setting here.