Once you have connected to your database, a new report can be created. Options for initially creating a new report include using the "Design Report..." button on the Main Toolbar, selecting the "Reports" > "New Report..." from the Group Bar within the Database Explorer, or by entering the REPORTS command at the R> Prompt.
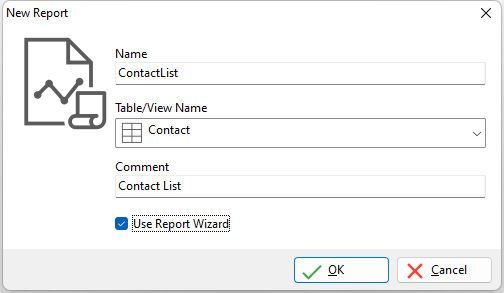
When initially creating a report, the following dialog will be presented in order to enter the report name, the table or view that the report will be based upon, and the report comment.

When you create a report, you must associate it with a table or view. This table or view provides the majority of the information you want to include in the report. If you want information from other tables, you can use expressions to look up this information. Or, if you are using Sub Reports, you can add tables to the report later. One way to include information from more than one table in a report is to build a query to specify the data you need, and then save the conditions as a view. You can then use the view as the driving view for the report.
There are two types of reports you can specify when creating a new report: a quick report, which you create using the Report Wizard, or a custom report, which does not use the Report Wizard.
Quick Report using the Report Wizard
Use this option to create a report from a table or view you select using the Report Wizard. The Report Wizard automatically places column objects that correspond to columns you choose. Building a quick report is the quickest and easiest method of providing a report printout. However, since a quick report does not take advantage of most of the features available in a report, you are likely to modify it later. After creating your report, the name, table/view, comment, size, latest revision date, and version number will be displayed in the Database Explorer.
Custom Report
A custom report provides a blank canvas for you to begin adding all types of controls to your report. After creating your form, the name, table/view, comment, size, latest revision date, and version number will be displayed in the Database Explorer.