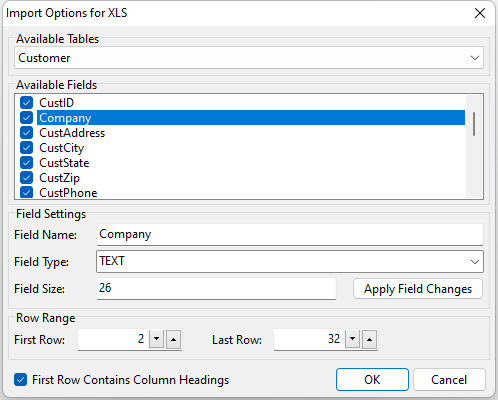
When importing MS Excel Spreadsheet data into a new table, you will be presented with the following dialog to configure the available options:

After selecting the sheet that you want from the Available Tables drop-down list, you can alter the field name, data type, and size by selecting the field from the list of Available Fields, typing in the new Field Name in the space provided, selecting the data type from the Field Type drop-down list, typing in the desired size in the Field Size box, and pressing the Apply Field Changes button.
You can also choose which fields are imported by checking or un-checking the box next to the field name.
NOTE: You will need to follow the aforementioned steps for each field that you wish to configure.
ð First Row
Specifies the position of the first row of data
NOTE: When using source files that have column headers or other information as a preface to the data, you will need to adjust this position to correspond with the row position of the first row of data to import
ð Last Row
Specifies the position of the last row of data. Default is blank to indicate all possible rows available.
NOTE: When using source files that have information as a suffix to the data, you will need to adjust this position to correspond with the row position of the last row of data to import. You can also use this value to import only a portion of an available data set within a source file by specifying the number of the last row of data that you want.