The Actions tab is the actual "nuts & bolts" of the whole application. This is where the application begins, because the menus are all dependent on the actions.
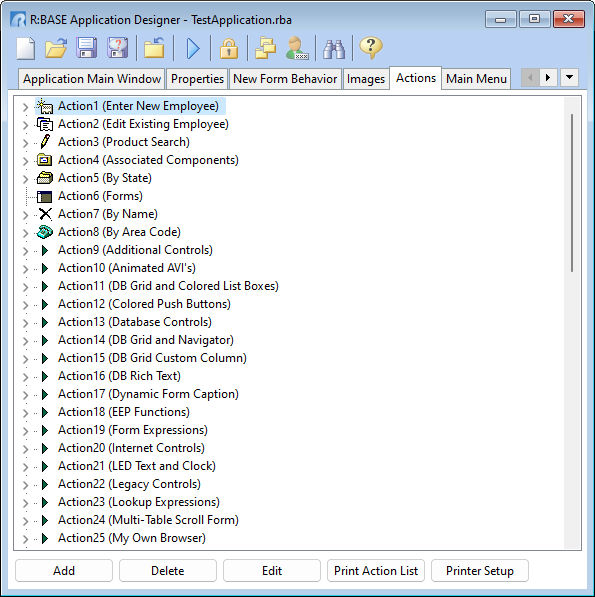
ð Add
Adds an action to the application file
ð Delete
Deletes an action from the application file
ð Edit
Edits an action in the application file
ð Print Action List
Prints the action list for documentation purposes
ð Printer Setup
Display the Printer Setup dialog for output routing
Actions can be rearranged by dragging and dropping the action up and down the list.
These are a few items to keep in mind as you explore the sample "Test Application" to familiarize yourself with the Application Designer.
•As you create actions, menus, toolbars, and drop-down menus, you will notice that virtually all the items have an option to specify an image. All of these items also have the option to specify a particular action to associate with the menu, toolbar button, etc. Even if you assign a particular image to these object properties, the image of the "Action" will supercede your selection IF you assign an action to the particular object. It is important to build your actions carefully, and use the images that you want to see in the end product at this level.
•As you will see later in the Toolbar design area, if you want to place a Drop-Down Menu Button on the toolbar, and only have the drop-down portion of the button (not the quick-select portion) active, to have an icon image show up on the button, you need to create an action, that has no real action, but that has an icon associated with it.
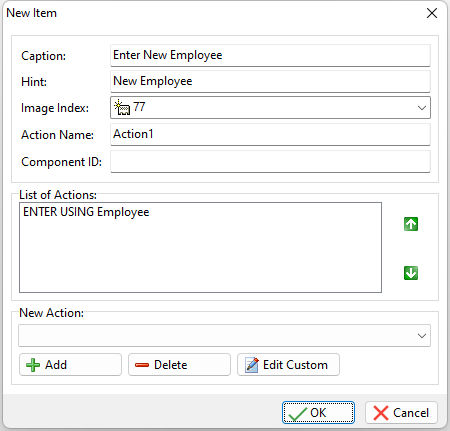
From within the Application Designer and viewing the Test Application .RBA file, by expanding Action1 so that you can view its list of inherent actions (clicking the + sign on the left side), you see that there is only one action, ENTER USING Employee. If there were more, they would have been displayed in a typical "tree" format.
Now, if you click the Edit button, you will be presented with a dialog that has all of the properties associated with Action1.