When you are adding or editing an action, the below dialog will be displayed.
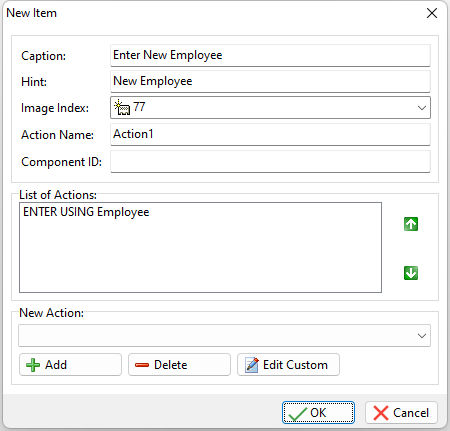
ð Caption
Specifies the text to display for the action. This will be visible in the application from drop down item submenu from beneath the Main menu bar, a Toolbar button or a Drop-Down menu item.
NOTE: If you use the hyphen character(-) for the caption of an Action, this will create a separator bar that you can place between Menu Items to create an organized appearance.
ð Hint
Specifies the text hint to be displayed when you hover your mouse cursor over the object. The hint will appear for a short period of time to give you a quick explanation of the action. Not all objects support the Hint property in the runtime mode. Objects that support the Hint property are the Drop-Down Menu Buttons and the Toolbar Buttons.
ð Action Name
Specifies a sequential number that is given to the action, as a default, when you create it. You can opt to leave this alone, or customize the Action Name to your specifications. One important key to remember is that the Action Name MUST be unique, and the system will verify this for integrity.
ð Image Index
Specifies an image to be assigned to an action. Available images include the image files loaded from the Image tab.
ð Component ID
The Component ID is a unique identifier used when passing PROPERTY parameters in statements, and allows additional control of the Action as it is listed in the Main Menu.
Assigning an R:BASE task to Your Action
When creating or editing actions, you have the option to select from a list of commonly used pre-defined actions. This list includes the option to create your own Custom Action, which will open the R:BASE Editor for you to make your command file.
Action |
Purpose |
Enter data using a form |
Adds data to a table using a predefined form |
Edit data using a form |
Edits data in a table using a predefined form |
Delete rows from a table |
Removes selected rows from a table |
Browse and edit rows in a table |
Uses the Data Browser to view and modify data |
Update rows in a table |
Changes selected rows of data without using a form |
Print reports |
Prints selected data using a report |
Print labels |
Prints selected data in a label format |
Set user identifier |
Enters or prompts for a user identifier |
Exit |
Exits from the application |
Run A File |
Runs a command file |
Custom Action |
Adds custom command lines to an application file |
When using pre-defined options, if you choose an option that requires a choice of forms, reports, etc., a dialog will prompt you to make a selection from the available items. In this same dialog box, you can also create a custom WHERE clause using the WHERE Builder.
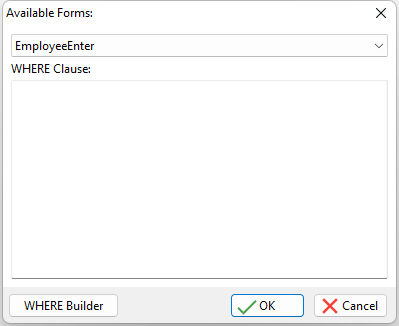
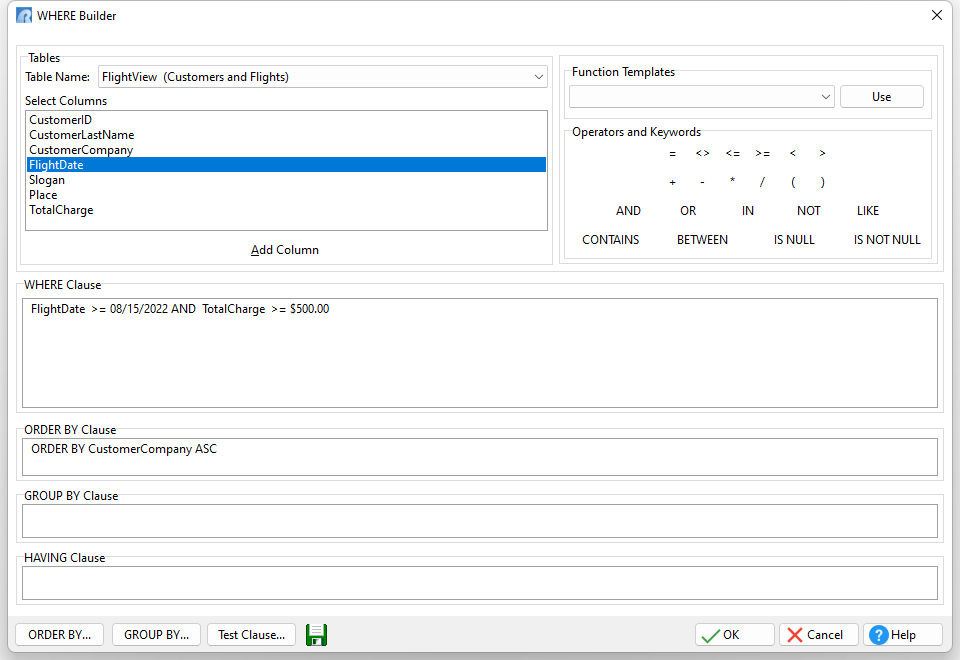
After selecting a form and building your WHERE clause and/or ORDER BY clause, you will return to the previous screen where you can add additional R:BASE actions.
As you can see, the method for creating actions is very simple and efficient. All the flexibility from the Legacy Application Express Designer has been maintained in this area.
Dialog Display Tip:
To add the option for user input dialog, use '@' symbol.
Examples:
WHERE EmpID = @'Enter Employee ID'
WHERE EmpLName LIKE @'Enter the first few characters of Employee Last Name followed by % symbol'
WHERE EmpLName CONTAINS @'Enter Part of Employee Last Name'