When using the Form Wizard, all of the column objects are the same size, but the columns in the table associated with the form typically allow you to enter different amounts of data. For example, the EmployeeState column allows entry of 2 characters, the EmployeeAddress column accepts up to 30 characters. We'll adjust the sizes of the column objects to indicate how much data can be entered.
To change the width of an object:
| 1. | In the "Form Designer" window, click on the DB Edit object to the right of "Employee #:". |
Handlebars appear on the selected object and the status bar shows the column name EmployeeID.
| 2. | Click and drag the "middle right" handlebar to the left. |
The width and height coordinates will appear as a hint once you select the handlebar. The coordinates will change as you drag the mouse to change the size of the field.
| 3. | Release the mouse button when the width value is 50. |
The height value remains at 22.
Repeat this procedure for the DB Edit object labeled "First name," only increasing the width to 160.
Now, change the widths for the following DB Edit objects:
Column Name |
Width |
EmployeeLastName |
160 |
EmployeeAddress |
240 |
EmployeeCity |
160 |
EmployeeState |
50 |
EmployeeZip |
90 |
EmployeeAreaCode |
50 |
EmployeePhone |
120 |
| 4. | Finally, click on the "Employee phone number:" Static Text object, and click and drag the "middle left" handlebar to the left to increase the object width, so all of the text is visible. |
With the widths of all the fields have been adjusted, we'll now make sure all the DB Edit objects are the same height.
To make all the column objects the same height:
| 1. | In the "Form Designer" window, click on the EmployeeID DB Edit object. |
| 2. | Press and hold the [Shift] key, then click on all the other DB Edit objects on the form. Do not click on any of the text objects. You can also select all the objects by lassoing the objects with your mouse cursor. |
The DB Edit objects are now enclosed by red handlebars, as opposed to blue, indicating that they are selected as a group.
| 3. | Right click on any of the objects and choose "Show Size Palette". A "Show Size Palette" toolbar button is also located on the Settings toolbar. |
A dialog will appear for adjusting the width and height of the selected objects.
| 4. | Under Height, select "Shrink to Smallest", and select OK. |
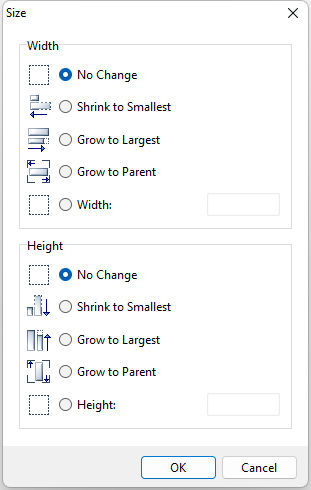
The height of all the column objects is adjusted to match the smallest height. All the column objects are now the same height.
| 5. | Click outside the red handlebar selected objects to deselect the fields. |
The form should now look somewhat like the following:
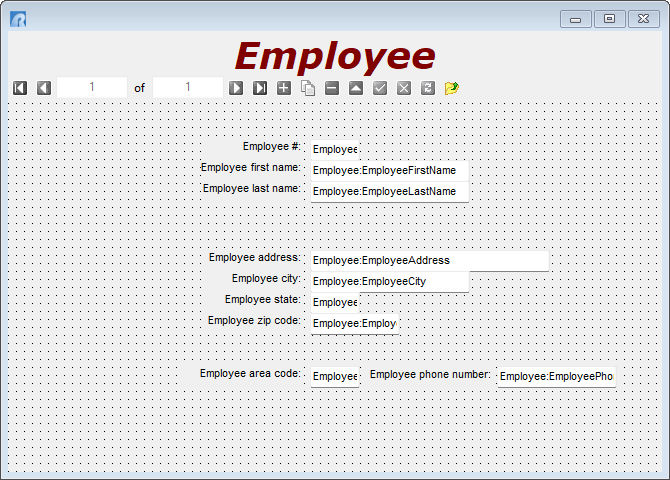
Next, we'll line up each Static Text object and its corresponding DB Edit object.