You have now finished defining actions for adding and editing data for the Employees, Customers, and Flights menu. Next, we'll define the actions for printing the data in the tables. We will create the menu action option for printing the employee list report, which you created in Lesson 5, a menu action option for printing customer labels, which you created in Lesson 6, and a menu action option to print the flight schedule, also from Lesson 5.
To define the action for printing the employee list:
| 1. | With the "Add Actions to Your Application:" screen, in the Application Wizard, still displayed, select the "Add" button. |
R:BASE displays the "New Item" dialog.
| 2. | Enter "Print Employee List" in the "Caption:" field. |
| 3. | Choose "Print Reports" from the drop down box. |
| 4. | Click the "Add" button. |
R:BASE displays the "Available Reports:" dialog.
| 5. | Choose EmployeePhoneList from the drop down box. |
We will not define a WHERE clause for printing this report because we want to list all employees.
| 6. | Click the OK button. |
The "New Item" dialog box is displayed with the action "PRINT EmployeePhoneList" menu option.
| 7. | Click the OK button. |
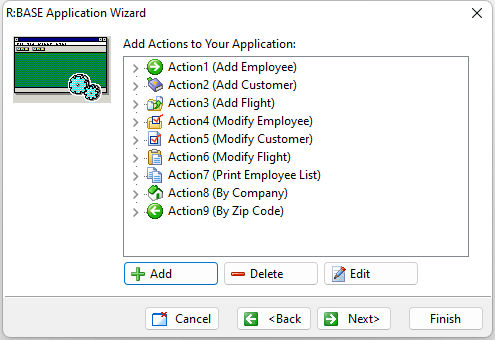
The new action is now displayed in the list of actions in the Application Wizard.
We have now finished defining menu actions for all the menu options on the Employees main menu.
Next, we'll define the actions for the "Print Customer Labels" submenu. These actions will provide the choices to print the customer labels by company name and by zip code. First, we will define the actions for each submenu option.
To define the action for printing the customer labels:
| 1. | With the "Add Actions to Your Application:" screen, in the Application Wizard, still displayed, select the "Add" button. |
R:BASE displays the "New Item" dialog.
| 2. | Enter "By Company" in the "Caption:" field. |
| 3. | Choose "Print Labels" from the drop down box. |
| 4. | Click the "Add" button. |
R:BASE displays the "Available Labels:" dialog.
| 5. | Choose CustomerLabelCompress from the drop down box. |
We want this action to print the customer labels by the company name.
| 6. | Click the "WHERE Builder" button. |
The "Where Builder" dialog box is displayed. R:BASE knows that the label CustomerLabelCompress is based on the Customer table. Customer is selected in "Table Name" and the columns in the Customer table are listed in "Select Columns".
| 7. | Select the "ORDER BY..." button on the bottom left corner. |
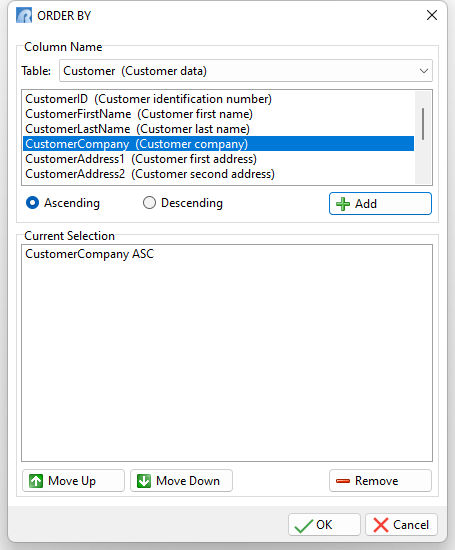
The "ORDER BY" dialog is displayed. This dialog allows you to distinguish which data appears first when it is displayed.
| 8. | Choose the CustomerCompany column. |
We want the company name to appear in ascending order. Make sure the radio button for "Ascending" is selected.

| 9. | Click the Add button |
The "Current Selection:" panel fills with the data "CustomerCompany ASC".
| 10. | Click the OK button to close the "ORDER BY" dialog. |
| 11. | Click the OK button to close the "WHERE Builder" dialog. |
| 12. | Click the OK button to return to the "New Item" dialog. |
The "New Item" dialog box is displayed with the complete command to perform the action for printing the customer label by company name in ascending order.
| 13. | Click the OK button. |
The new action is now displayed in the list of actions in the Application Wizard.
| 14. | Repeat the above steps to create the next action to print customer labels by zip code using the following: |
•Enter "By Zip Code" for action "Caption:"
•Select the "Print Labels" predefined action and the CustomerLabelCompress label.
•In the ORDER BY dialog, select the CustomerZip column to print in ascending order.
The new action should now be displayed in the list of actions in the Application Wizard. If you have not added images to your actions, you can do so at a later time.
