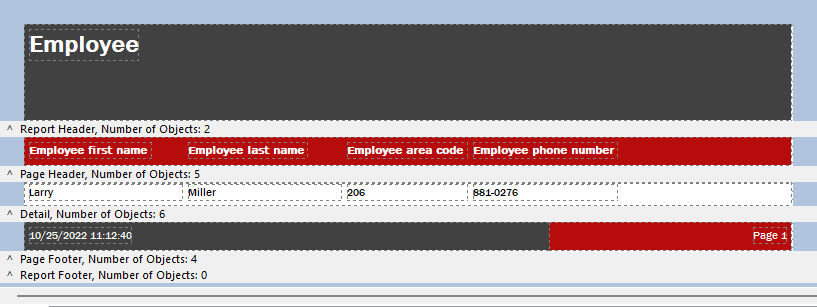
First, we want to edit the text object for the title in the Report Header section (the gray band across the screen marked Report Header) and increase the size of the section. A report header is printed at the top of the first page of the report.
To make the Report Header section larger:
| 1. | In the "Report Designer" window, click on the gray band marking the bottom of the Report Header section and drag it down the screen to the 1 inch line on the ruler, making the section larger. You will notice the cursor will change to an arrow, pointing up and down. |
The vertical ruler adjusts to reflect the new size of the Report Header section.
Now that we have made the Report Header section larger, we'll edit and add text for the report title.
To edit the report title text object:
| 1. | In the "Report Designer" window, choose the object "Employee" in the Report Header. |
You will notice the blue handlebars on the selected item and that the "Edit" toolbar will become enabled with the text "Employee" in it. If you do not see the Edit toolbar, deselect the object, and select it again.
The Edit toolbar will appear differently based on the selected item. If you select or add text, the text will appear in the toolbar for editing. If you select or add a column object, the Edit toolbar displays two drop down boxes showing the table in one, and the available columns in the second. If you select or add a variable, a drop down box appears with a list of defined variables.
| 2. | Replace the text "Employee" within the Edit toolbar with "Employee Phone List". To easily overwrite the existing text, double click in the Edit toolbar to select all the text, and then begin typing. |
| 3. | Hover your mouse cursor over the right handlebar and drag the right side of the object so you can see all of the letters. |
Next, we will center the text, using the toolbars, so it appears directly in the center of the page.
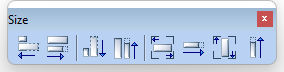
| 4. | With the text object still selected, click the "Grow to Parent Width" button on the Size toolbar. It is the fifth button from the right. Use the hints to find the correct button. Doing so will increase the text field to the same width as the report band. |
| 5. | Then, click the "Center Horizontally in Band" button on the Align or Space toolbar. It is the sixth button from the right. Use the hints to find the correct button. Doing so will center the object within the report band. |

Similar to word processors and other Windows-based programs, you will notice the toolbar with a list of font styles and sizes with buttons to bold, italicize, and underline text. Next to those buttons are the buttons to edit the justification of selected text as well as color. This is the "Format" toolbar, which primarily formats text.

| 6. | Select the "Center" button for text justification. |
Now we will move the text down to make room for the company name to be added above the title. Moving objects in the Report Designer is the same as moving objects in the Form Designer.
To move a report object:
| 1. | In the "Report Designer" window, choose the text "Employee Phone List". |
| 2. | Press and hold down the [Ctrl] key on the keyboard. |
| 3. | Use the down arrow key to move the text down, right above the Report Header band. |
Now we will add the company name to the report.
To add a text object to the report title:
| 1. | In the "Report Designer" window, first make sure the text "Employee Phone List" is selected, then choose the "Label" button. |
The Label button is located on the Standard Controls toolbar with "A" on it. Like the Form Designer, when a button is chosen, it will remain selected.

| 2. | Position the cursor above the existing report title and click the left mouse button. |
The new text will take on the style, font, and size of the selected object on the report designer. The text should be Franklin Gothic Medium, 18, Bold. This saves times when adding multiple objects. The text in the label should read "Label1".
| 3. | In the Edit toolbar, change the text from "Label1" to "SkyWrite Ink". |
| 4. | Change the font size to 24. |
Now we will center and resize the company name with the title using the "Align or Space" and "Size" toolbars again.
| 5. | With the the "SkyWrite Ink" text still selected, click the "Grow to Parent Width" button on the Size toolbar. |
| 6. | Then, click the "Center Horizontally in Band" button on the Align or Space toolbar. |
The company text will now be the same width and size of the band.
| 7. | Select the "Center" option for "Justification". |
| 8. | Click the mouse button elsewhere in the workspace to deselect the items. |
If you want to move the company text up or down, select the item and use the [Ctrl] + [Up Arrow]/[Down Arrow] keys.
Next, we'll edit the column headings.