As you're building the Employee Phone List report, you can refer to the sketch as you need to. Make sure that you are connected to the SkyWrite database.
To start building the Employee Phone List report:
| 1. | If the SkyWrite database is not open, click the "Databases" option in the Database Explorer and select "SkyWrite" and click the "Connect Database". |
| 2. | In the Database Explorer Group Bar, click the "Reports" option. |
| 3. | Click "New Report". |
R:BASE displays the "New Report" dialog box.
| 4. | Enter "EmployeePhoneList" in "Report Name". |
Next, you must select the driving table or view on which the report will be based. Remember, this is the table or view that contains the rows and columns from which most data is gathered.
| 5. | Select "Employee" from "Table/View Name". |
| 6. | Enter "Employee Phone List" in "Report Comment:". |
For the Employee Phone List report, we'll use the "Report Wizard" option to build a basic report, and then modify it.
| 7. | Place a check in the "Report Wizard" check box. |
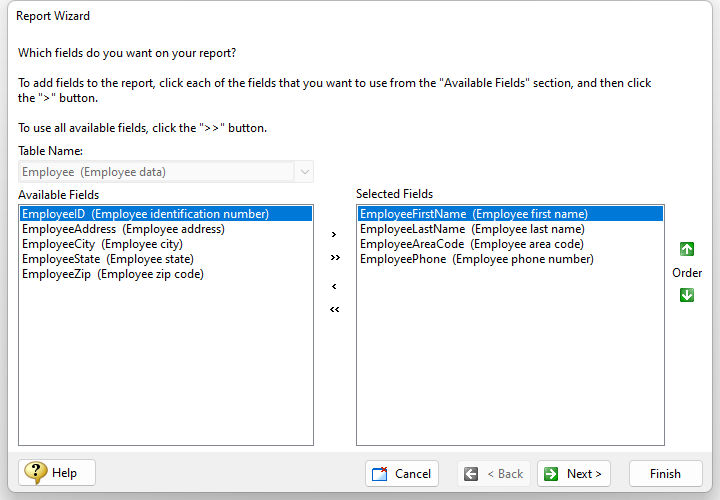
R:BASE displays a list of the columns in the Employee table. Because this report will be used as a telephone list, you don't want to include all of the columns-just those containing name and telephone numbers.
| 8. | Using the arrows between "Available Fields" and "Selected Fields", one at a time select the following columns from the list: EmployeeFirstName, EmployeeLastName, EmployeeAreaCode, and EmployeePhone and move the column to the "Selected Fields" panel. |
The green arrows for "Order" allow you to sort the columns in any order. The order should be EmployeeFirstName, EmployeeLastName, EmployeeAreaCode, and EmployeePhone.
| 9. | Select the "Next" button. |
The Report Wizard is prompting you to place a Break in the report. This item will not be used on this report and will be discussed later in this Lesson.
| 10. | Leave the "Breaks" panel empty and select the "Next" button. |
The Report Wizard now provides "Layout" and "Orientation" options for your report. You can toggle between the "Vertical" and "Tabular" Layout options to see how the report will look in the preview panel on the left.
In a "Tabular" layout report, the data from your columns is printed like a table on the report.
First name Last name Area code Phone
Larry Miller 206 881-0276
Charles Short 206 564-9123
In a "Vertical" layout report, the data from columns is printed in rows.
First name: Larry
Last name: Miller
Area code: 206
Phone: 881-0276
First name: Charles
Last name: Miller
Area code: 206
Phone: 564-9123
| 11. | Select the "Tabular" option for Layout. |
You can also toggle between the "Portrait" and "Landscape" Orientation options.
| 12. | Select the "Portrait" option for Orientation. |
An additional option is available to use the field descriptions as captions, where the column descriptions are applied to label objects associated to the corresponding DB Label objects.
| 13. | Check the option for "Use field descriptions as captions" |
| 14. | Click the "Next" button to accept the information you've entered. |
With the Report Wizard, you are now given the option to add a style to your report. You can toggle through all the styles and see the available colors and fonts. For SkyWrite, Ink, we will follow the same color pattern.
| 15. | Select "Corporate" and select the "Next" button. |
The final option prompts you to preview the report or modify the report's design.
| 16. | We will go straight to the designer. So leave the "Modify the report's design" option selected, and select "Finish". |
R:BASE uses all the information you've entered to build a basic report and displays the report in the "Report Designer" window.