The Master/Detail Table Form option will provide menus to select another table which shares a common column name with the table/view the form is being based upon, along with the columns to appear on the form and a field display arrangement.
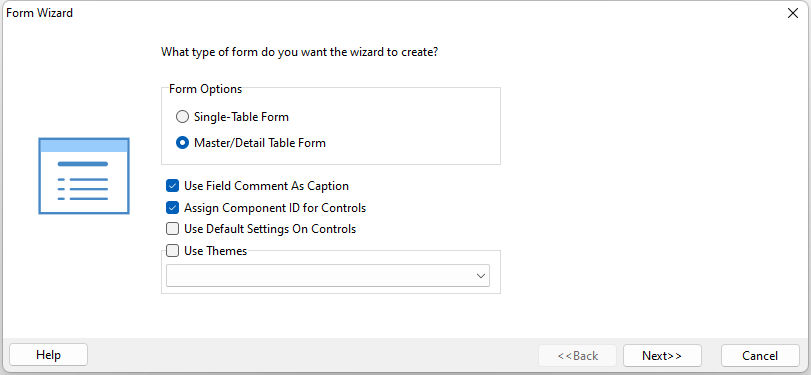
The settings for the Form Wizard provide options for the created form.
•Use Field Comment as Caption - specifies the label caption for each associated column will use the column comment
•Assign Component ID for Controls - assigns a unique identifier to each control, which can be used to alter the control with programming
•Use Default Settings for Controls - specifies the form will use the customized default settings established for forms and form controls
•Use Themes - assigns a theme to the form
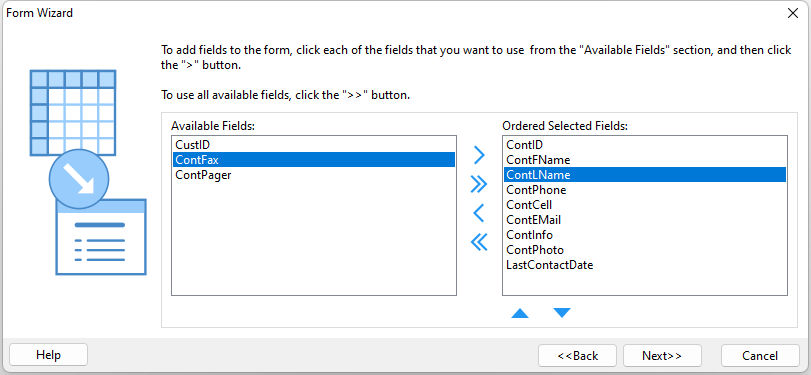
Next, the From Wizard displays a list of the columns for the Master table. Using the arrows, move any columns that are to appear on the form. Use the double arrows to move all of the columns at once. The up and down arrow buttons are available to place the columns in a desired order.
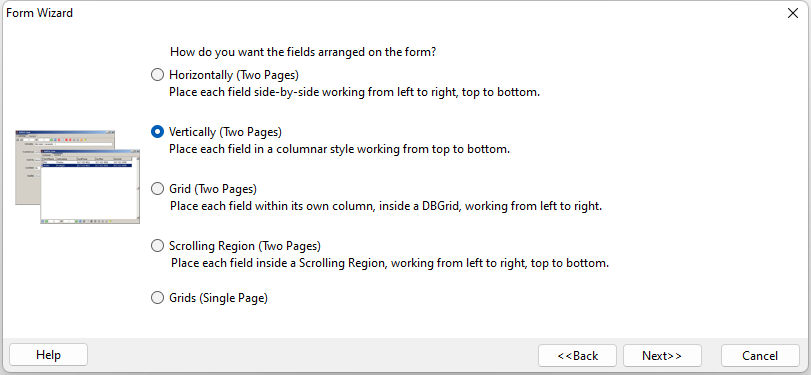
The following screen provides five options for the field arrangement of the columns on the form. The first four options, Horizontally, Vertically, Grid, and Scrolling Region, offer two page options using an Enhanced Tab Control, where each table is displayed on a separate page. The last option Grids (Single Page) places the two grids on a single page. You can preview how the form will appear by selecting each option. With many individual fields, the Vertical option may be more ideal.
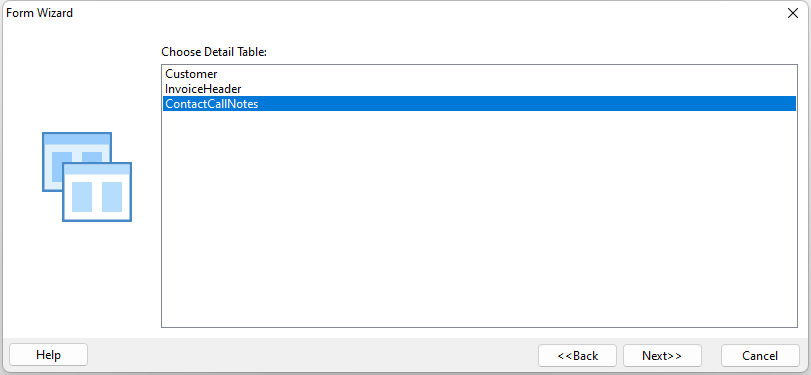
The Form Wizard will then display a list of tables which share a common column name with the Master table that the form is being based upon. The selection will be the Detail table.
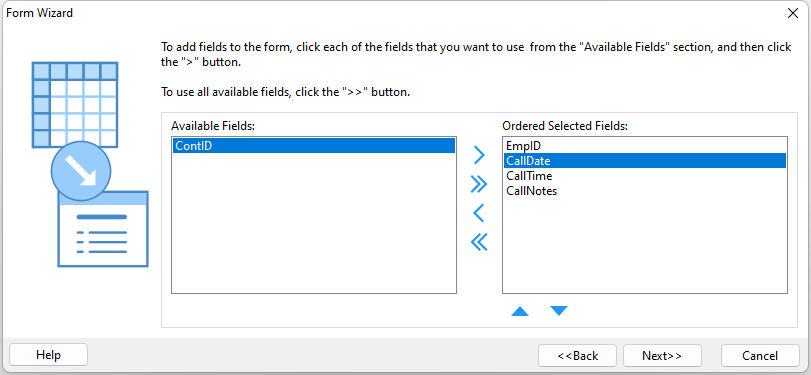
The wizard then displays a list of the columns for the Detail table. Using the arrows, move any columns that are to appear on the form. Use the double arrows to move all of the columns at once. The up and down arrow buttons are available to place the columns in a desired order.
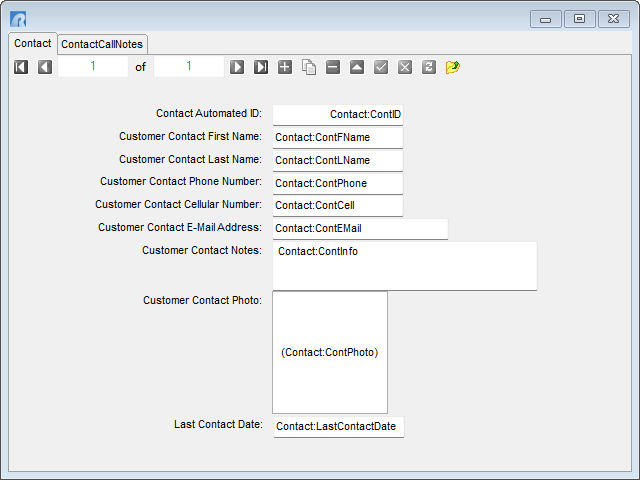
R:BASE will then build the form and display it in the Form Designer window.
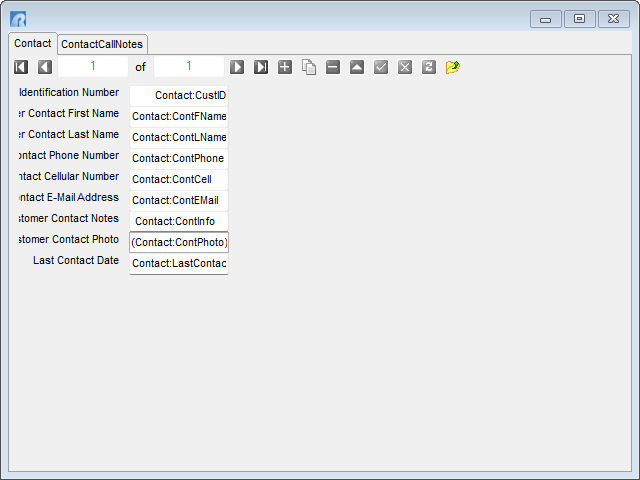
With the Form Wizard, R:BASE has placed a number of field objects with the table name and the column name with a white background and black text (default settings). These objects represent the column data for that table for entering, editing, and browsing data. These objects are very commonly used in the Form Designer and are called DB Edit objects. The R:BASE Form Wizard has placed the column comment as the caption for the Static Text (first name, last name, etc.). The fields can be centered more so, and increased in size. As the form fields are located in a parent control (tab control), the [Ctrl] key be held down to lasso and select multiple objects as a whole.
With the Enhanced Tab Control each table name is displayed as a tab. The Align property for the tab control is set to "Client", where the tab control aligns itself to the form area by automatically expanding to fill the form. The Align property would need to be changed if the tab control is to be changed in size.
Below the tab is an Enhanced DB Navigator control for moving forward/back, adding, editing, saving, and deleting rows in a table. The Enhanced DB Navigator is set to be aligned to the "Top" of the tab control, where the object aligns itself to the top side of the tab control to automatically grow or shrink. The Align property would need to be changed if the navigator is more desired for the bottom of the form.
To switch between the tabs, right click on the tab page and select from the "Next...", "Previous...", or "Goto..." page options.
The ability to alter the form controls and add new items is detailed within Lesson 4 of the R:BASE Tutorial.